Recipe - Creating a Dynamic Walkthrough for Pages
Skill level: Intermediate
Organization: Berwyn United Methodist Church
Requires Rock: 1.13.0
{# strip images & classes from the HTML but otherwise leave structure #}
In
RockRMS, users often encounter web forms, reports, and content channels that can be complex and overwhelming.
They may need help understanding what information is being requested, what steps to take next, or how to
interact with various elements on the page. This lack of clarity can lead to frustration, errors, and a
more-than-optimal user experience.
Additionally,
there are scenarios where specialized information is required or specific attributes must be explained to users,
but cluttering the screen with permanent instructions can be counterproductive.
To
address these challenges, we aim to create a tech solution that provides guided walkthroughs with tooltips and
descriptions. These interactive guides will help users navigate through the interface step by step, ensuring
they understand what's required and making it easy for them to enter information as they follow along.
Special
Shoutout to Philip Bassham and his Recipe "Make
Feature Tutorial Walkthroughs on the UI with Driver.js." Before
that, I would not have known what Driver.JS was and would not have been inspired about how to make building the
walkthroughs more dynamic.
Recipe
Step 1: Create the "WalkthroughDictionary" Global Attribute
- Log
in to your RockRMS instance.
- Navigate to the Admin Tools > General > Global Attributes.
- Click the + button to add a Global Attribute
- In the creation form, specify the following details:
- Key: "WalkthroughDictionary" (This key must be exact).
- Name: Provide a descriptive name for the attribute, e.g., "Walkthrough Configuration."
- Security: You will need to update edit security on the global attribute so that people who are
programming the walkthroughs will be able to save what they do.
- Field Type: Memo
- Set the initial value to [ ].
- Save the Global Attribute.
Step 2: Create a Lava Shortcode Titled "Walkthrough Button"
-
Log in to your RockRMS admin panel.
-
Navigate to Admin Tools > CMS Configuration > Lava Shortcodes.
-
Click the + button or an option to add a new shortcode.
-
Fill in the following details for the Lava Shortcode:
- Name: Walkthrough Button
- Tag Name: walkthrough
- Tag Type: Inline
- Description: This shortcode adds the necessary JavaScript to insert the Page
Walkthrough button. The button is designed to highlight various fields on the page and provide context
and instructions to the user.
-
Shortcode Markup:
See File Below
-
Parameters:
- includetooltips: false
- identifier: Leave Blank
- includelabelitems: false
- programmode: false
-
Enabled Lava Commands: RockEntity
-
Save the Lava Shortcode.
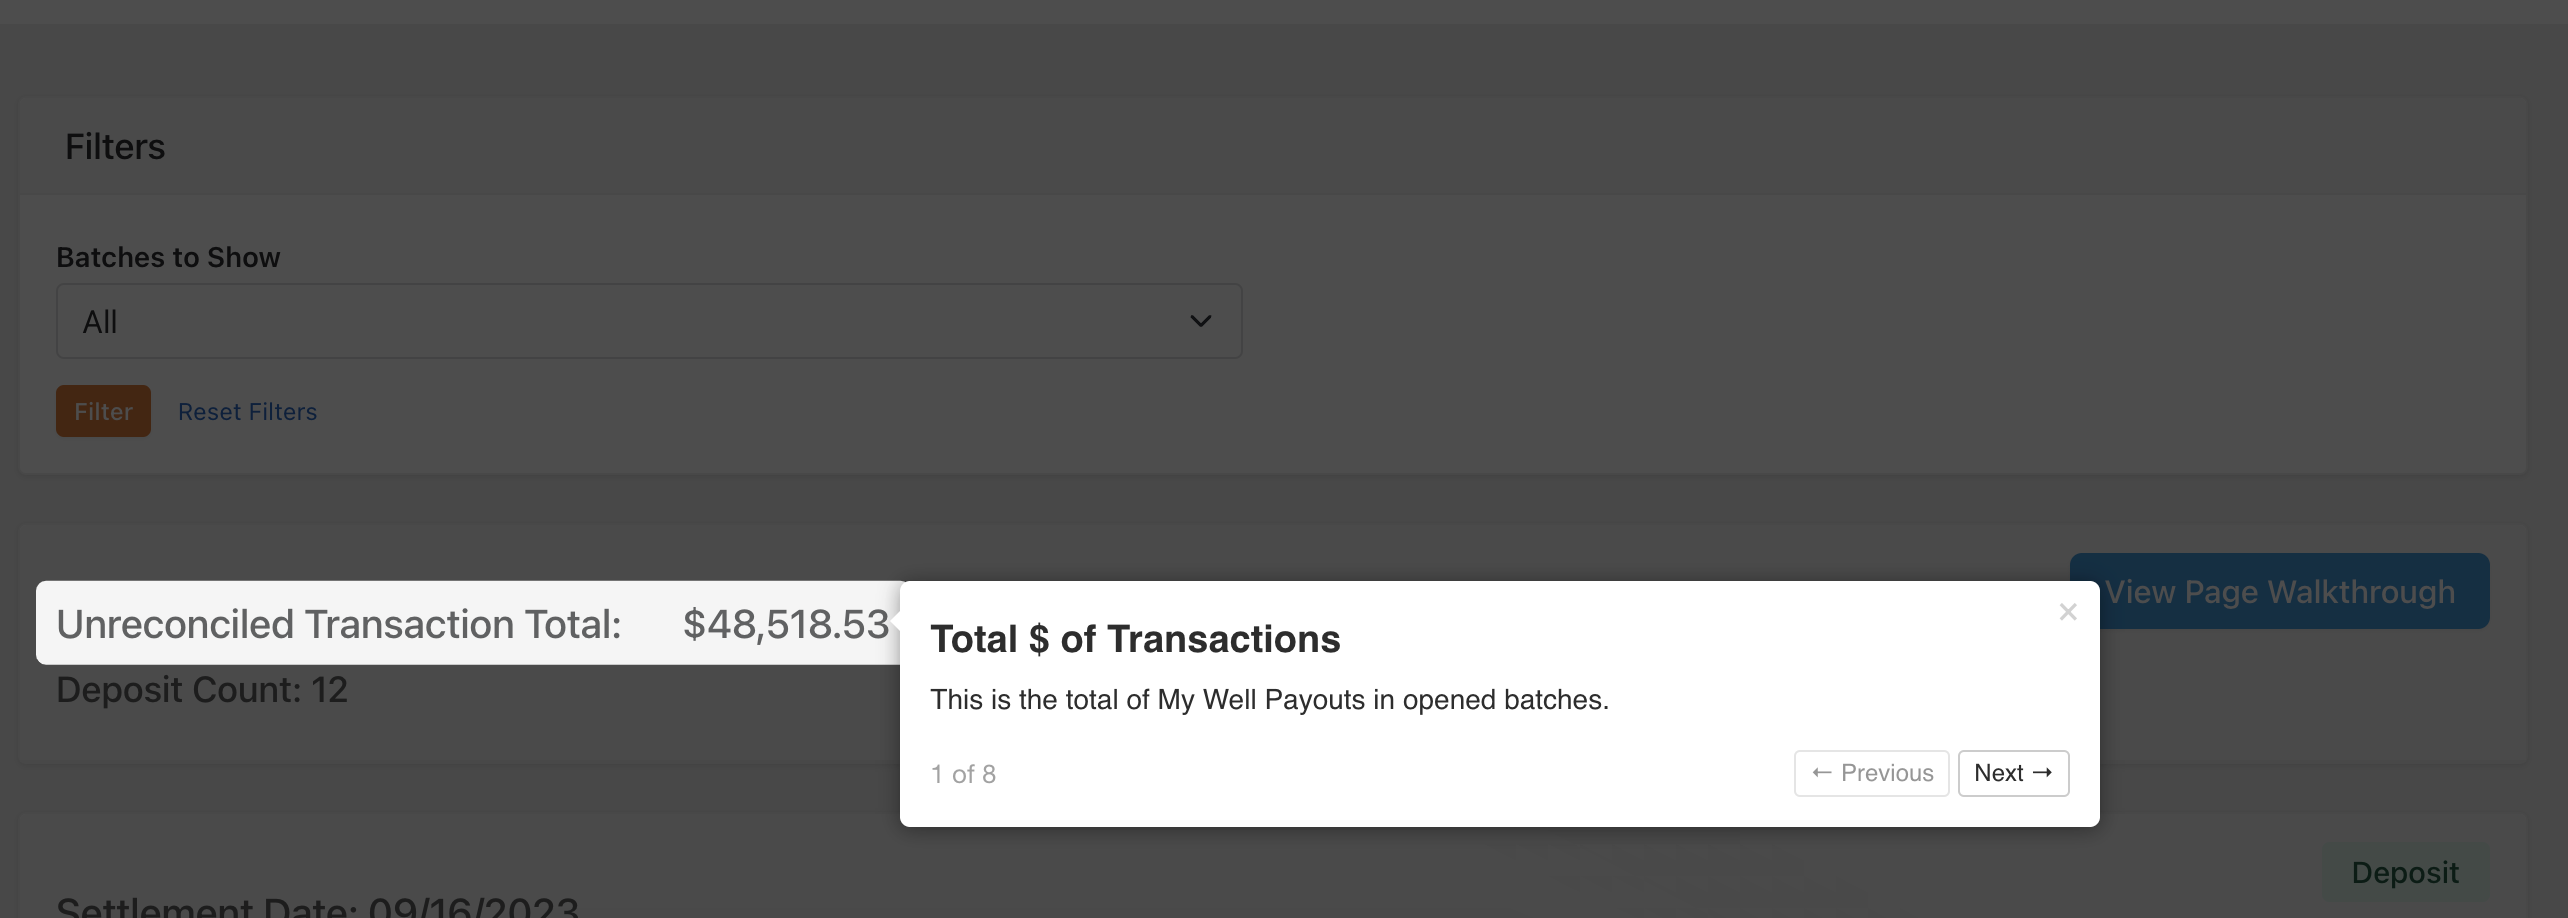
What is this code doing:
When this shortcode is called, a button is added to the page, and when the button is clicked, an item by item
animated walkthrough is shown. This walkthrough darkens everything but a highlighted item, and a modal shows a
title and description of what is highlighted.
How Do I Add Items to the Walkthrough:
This is where the magic happens! There are three ways to add items to the walkthrough.
1. Wrap Elements on your page and in your reports: Give elements on the page a class of walkthrough and data
attributes of data-walkthrough-title and data-walkthrough-description. i.e. data-walkthrough-title="Enter a
Start Date" data-walkthrough-description="This date is when items will start appearing in the news section of the
website."
2. The includetooltips parameter: If this is true, the shortcode will search for all the tooltips on the page
and add them to the walkthrough. The label nearest to the tooltip will be the walkthrough item title, and the
tooltip will be the content of the walkthrough. This
feature allows you to use the attributes themselves as the creator of the walkthrough by adding a description
when creating the attribute, effectively adding a tooltip to the page.
3. The includelabelitems parameter: Setting this parameter to true will add all label items to the page that
are not in a walkthrough class and do not have a tooltip with them. The label will be the title and content
saved to the dictionary as the content.
But how do I add items to the dictionary?
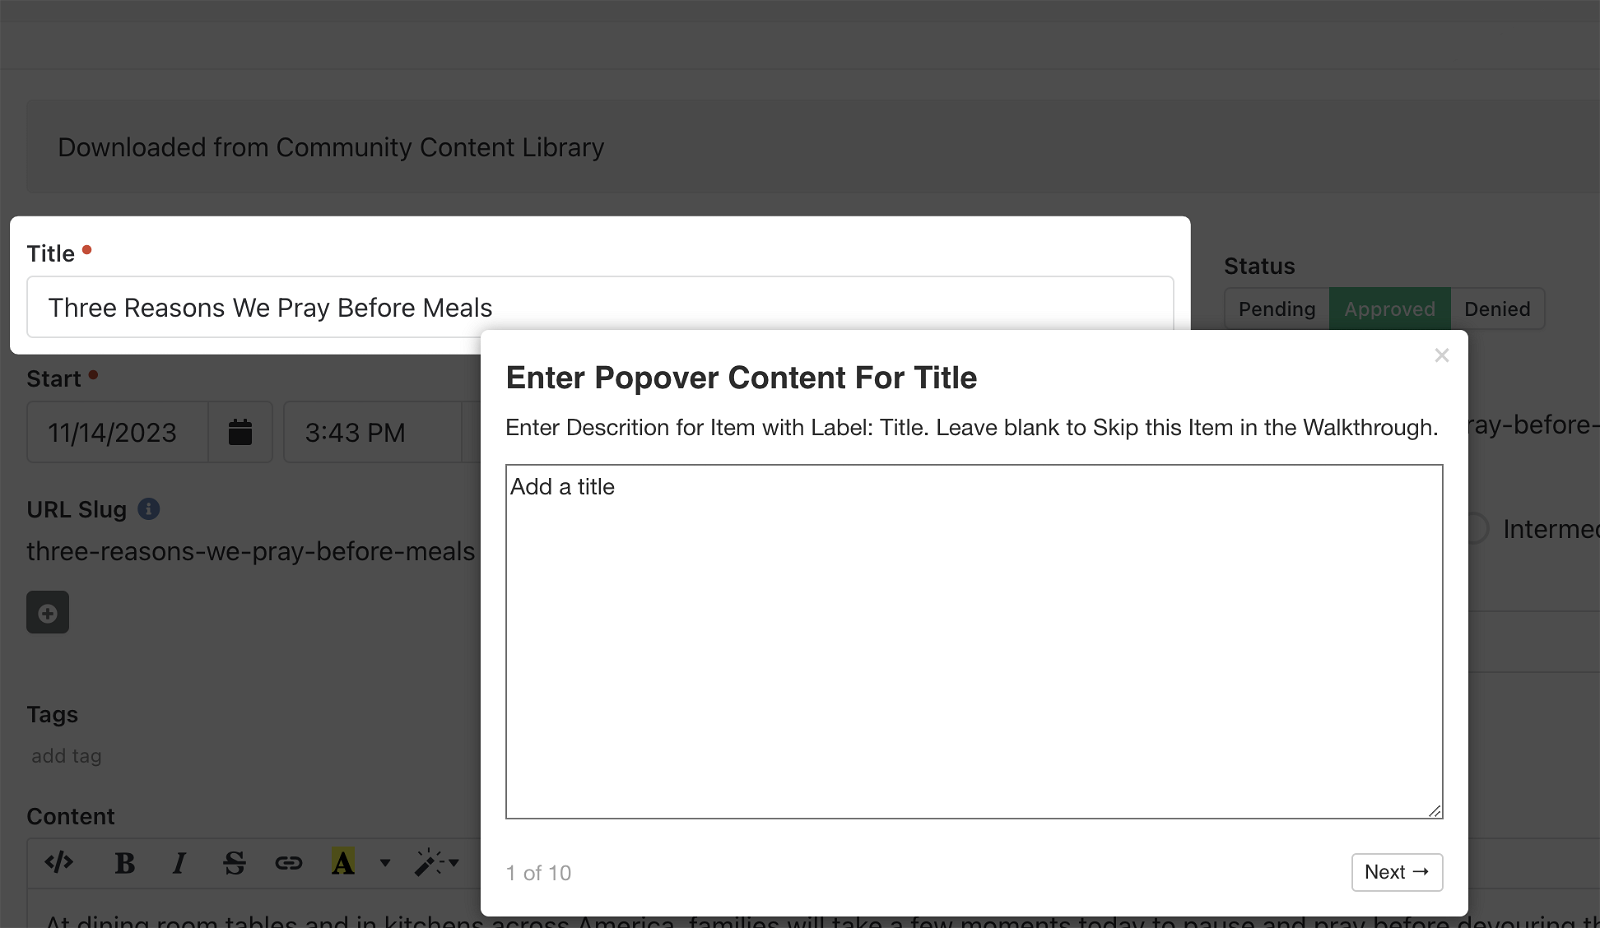
3. The programmode parameter: Put the short code in program mode. The shortcode will find all labels on
the page and allow you to step through them as if they were a walkthrough. Instead of showing content, however, it
will show a textfield where you can type your own content. And you get to use HTML to format it. As you step
through any item you give a description to will be included in the dictionary, conversly, any item you remove the
description from will be removed from the dictionary. Just step through the walkthrough.
When you reach the end or you click the close button, a modal asking if you want to save the dictionary to the global
attribute. Then turn off program mode and step through your walkthrough.
That's Pretty Cool, but How Do I Distinguish Between Fields on a Form and Fields on a Content Channel?
The identifier parameter: This parameter is a string that you can pass to the shortcode to identify the items from the dictionary you want to include in the walkthrough on the page. You can use this identifier anywhere you use the shortcode, but it is also used when saving the individual items you set in the dictionary itself. With this you could load one identifier for a Blog Post content channel item and another for your messages content channel.
Future Improvements
I want to explore other places to store the created dictionary and whether a single dictionary or one for each
identifier would be better. Interactions may be a better place to store these. The entire JSON dictionary is
loaded when the page loads and label items with matching identifiers are found using a find function.
Download related file (shortcodemarkup_updated.lava)
Screenshots
- /GetImage.ashx?guid=298c7cb5-5127-4f45-874d-1ac245f5ed13